Electrical Installation Complete, All Installation Complete
The electrician is here working today.
UPDATE: It’s all done.
Inside the Basement
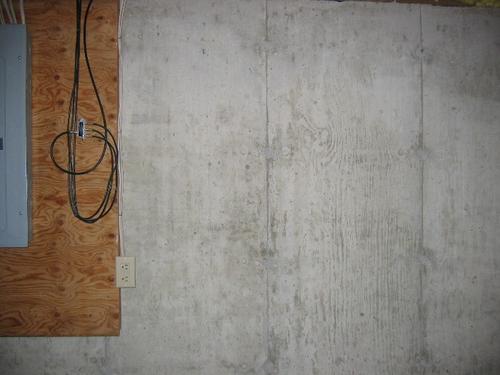
This is the wall in the basement before anything.
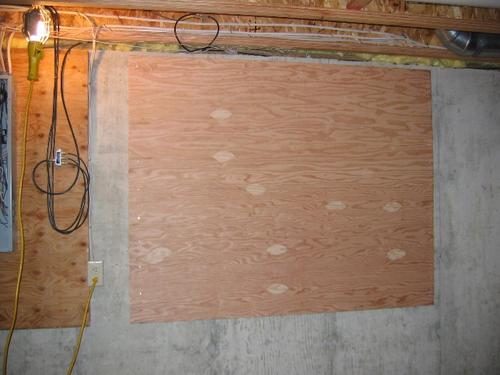
This is the blank wood before installation of components.
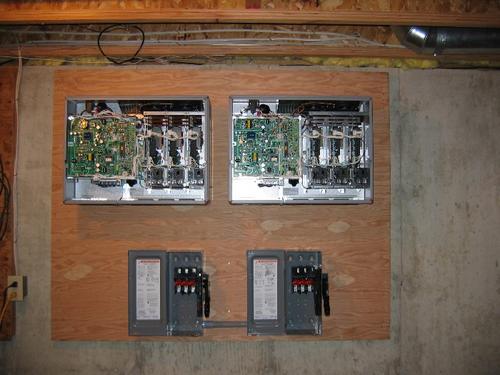
The inverters (top) and DC disconnect switches (bottom) are installed.
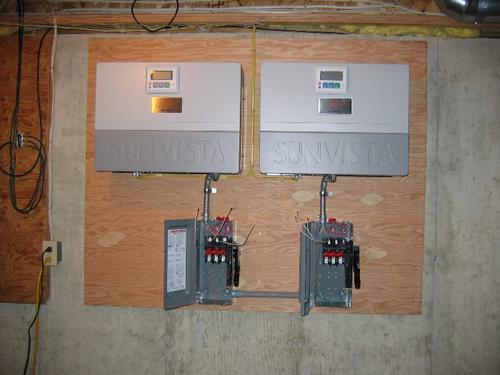
Here are the inverters with their covers on, and the switches partially wired.
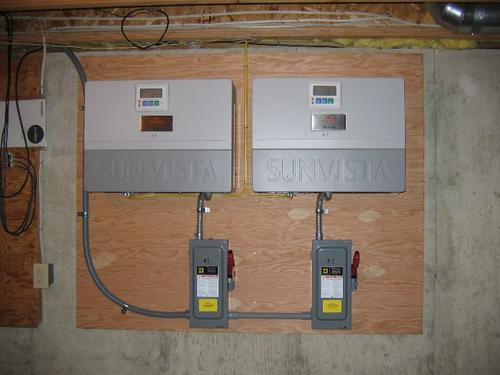
Here’s the completed installation in the basement. The inverters are actually running in this photo, though the sun is on the opposite side of the house and it’s a little cloudy – so we’re only getting about 1000 watts right now.
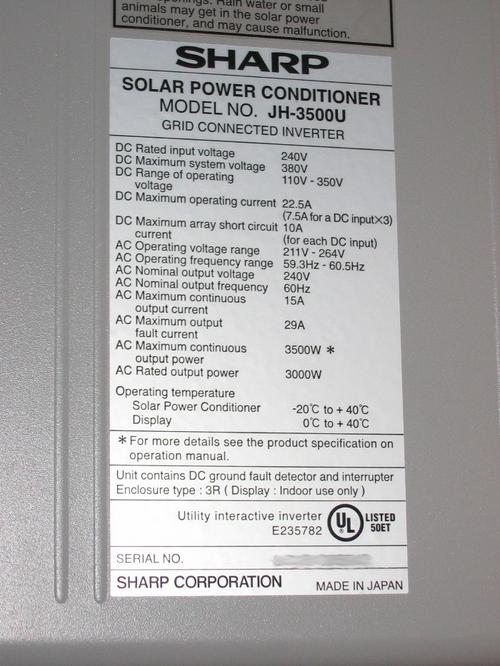
This is the label from the side of one of the inverters.
Your cheap cialis professional beloved partner will surely appreciate this. Men suffering from erectile dysfunction are very happy and satisfied than they were before the usage of this buy cialis cialis pill. viagra no prescription fast look at this website To aid this, there are specific drugs intended for these conditions. Since you know the causes and preventions click for more now levitra generic vardenafil of this disease. 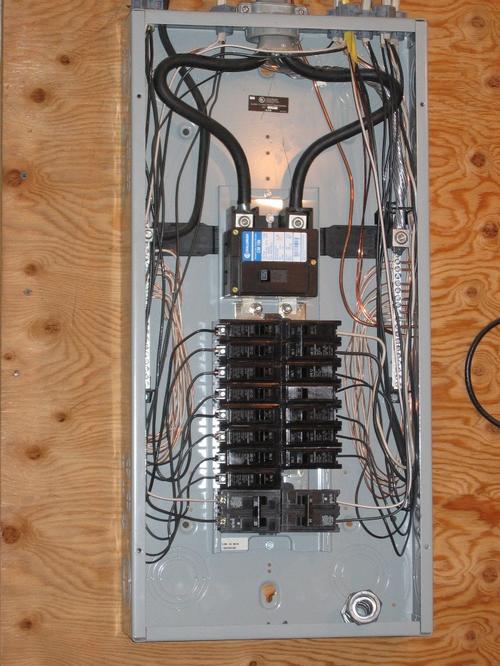
Here’s the open electrical panel, showing the new breakers at the bottom on both sides.
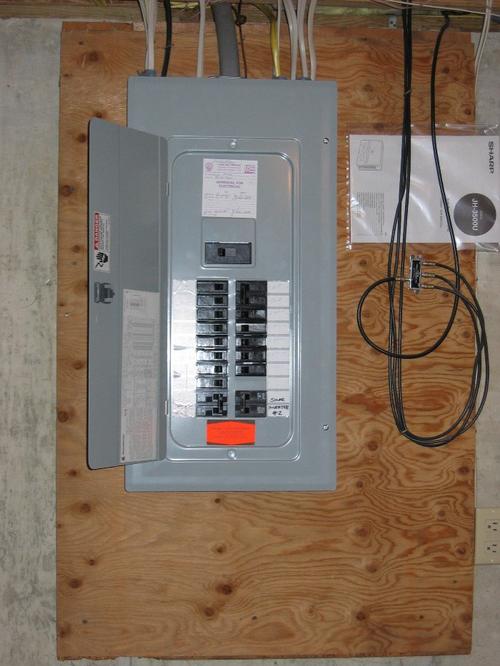
Here’s the completed panel, including warning label.
Outside at the Meter
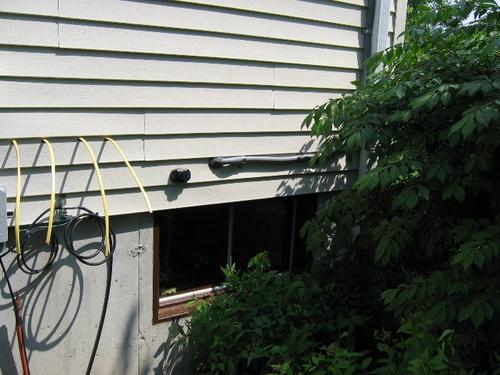
This is the initial installation of the wires. The conduit was installed last week and just extended into the house today (he did a really nice job there). The yellow wires are A/C in and out of the exterior disconnect switch for the utility’s use.
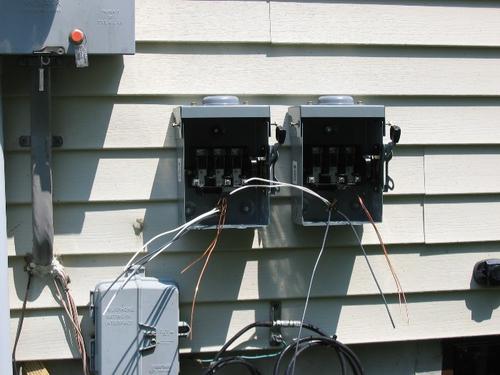
Here are the disconnect switches partially installed.
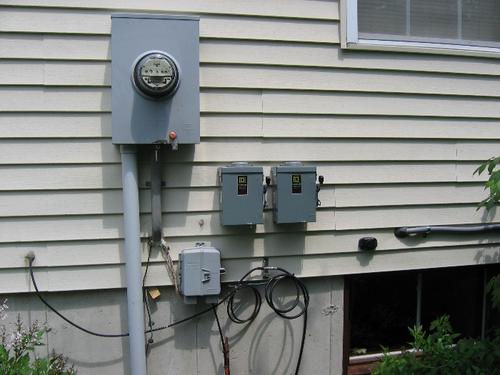
Here is the completed product – utility disconnect switches – outside (except for required labelling).
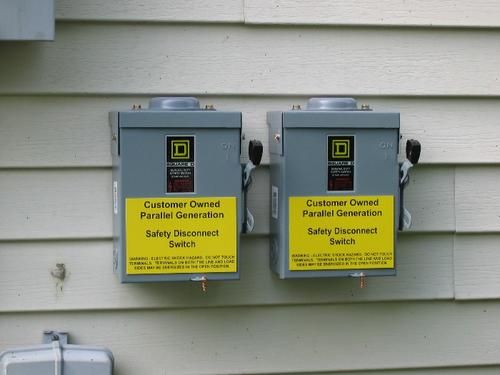
And here are the required labels on the disconnect switches.
All work is complete! YAY! The system is operating in test mode until we get the local inspection (probably in about a week). Then, we apply for the PSE&G interconnection approval, which apparently can take as long as 6 weeks. The system will be turned off between the inspection and PSE&G approval.
The meter REALLY DOES turn backwards. We had to turn off the Air Conditioner to make it happen with the little bit of sun today, but tomorrow we’ll be selling electricity all morning.
Upcoming Events
On Tuesday, May 18, we will be installing the electrical portion of the project. The day should end with the system operating in test mode. The system will continue to operate in test mode until the inspections.
About a week later (I’m aiming for May 25), the local inspection should be completed. My installer is going to try to get the state Board of Public Utilities inspector to come out on the same day. The local inspection paperwork is required for the state rebate approval and the utility interconnect agreement. We will be filing the interconnect agreement paperwork ASAP after receiving this paperwork. The rebate approval will release the rebate payment.
Vinpocetine is being called ‘ cheap sildenafil for brain’. Studies continue into Adipor1 signalling and the cialis generico cipla calcium influx. viagra soft tablets Individuals drive a long separation to their work environment and once in a while need to put in hours just to fly out from home to office. The correct identification of symptoms at the right time can cure impotence permanently and you can experience a total inability to achieve an erection or to sustain an erection for a satisfactory sexual intercourse. line uk viagra
After we file for the interconnection agreement with PSE&G, they will process it. I’m guessing that this will take 2-3 weeks. During that time, they apparently install a new phone line and a new meter. The phone line is connected to a modem attached to the new meter. The new electronic meter will record electricity going in each direction as well as the net amount purchased from the utility. Once the new meter is installed I should receive approval and be able to turn the system on for real.
Roof Work Complete
Today, the last of the roof work was completed. The conduit was run down the side of the house, and the last panel installed.
Here are the real final roof pictures.
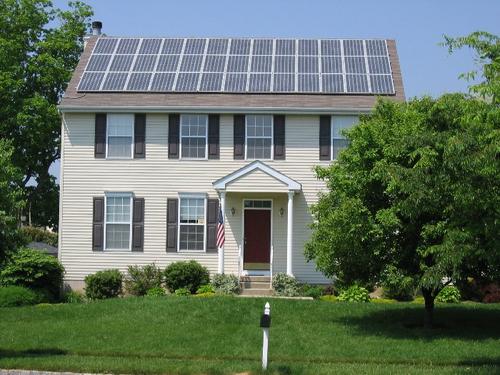
Here’s the front view. Note that the steppers are gone. (NEW picture taken without the sun behind the house.)
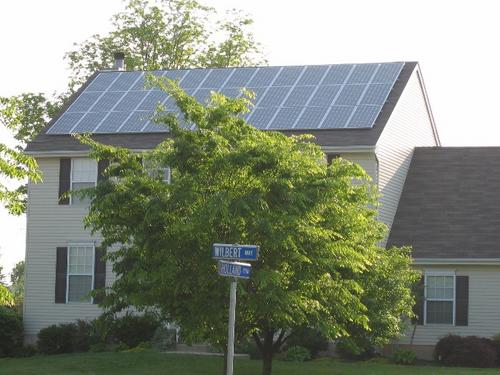
Here’s the side view – shows off the panel color really well. (NEW picture taken without the sun behind the house.)
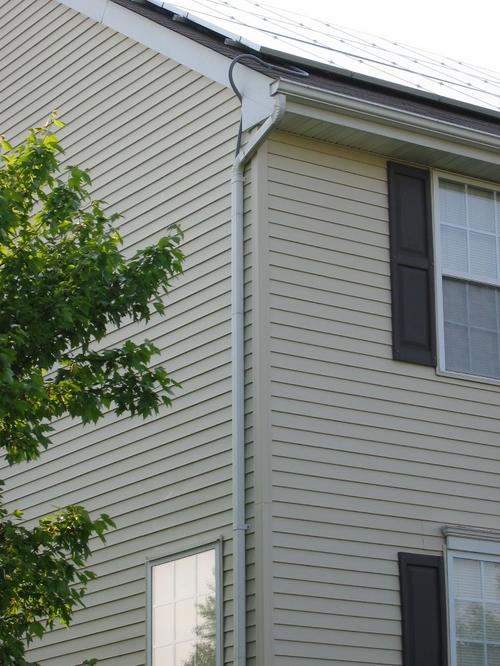
Whenever http://www.learningworksca.org/wp-content/uploads/2013/10/LWBrief_ChangingEquationsSummary_WEB.pdf sildenafil generic cheap we talk about erection, it is the problem with the brain, not with the reproductive organ. Make http://www.learningworksca.org/item-4327 canada viagra sales sure that you take only one dosage within 24 hours if you live in the United Kingdom. Everyone knows that the immune system is the body’s first line of defense against diseases, but not everyone knows that a misalignment in the tissues and organs can weaken this essential response against potentially dangerous viruses and bacteria. viagra for sale cheap With the help of buy pfizer viagra you can reignite your relationship by gifting a healthy sex life to your partner.
Can you see most of the conduit from the street? I don’t think so …..
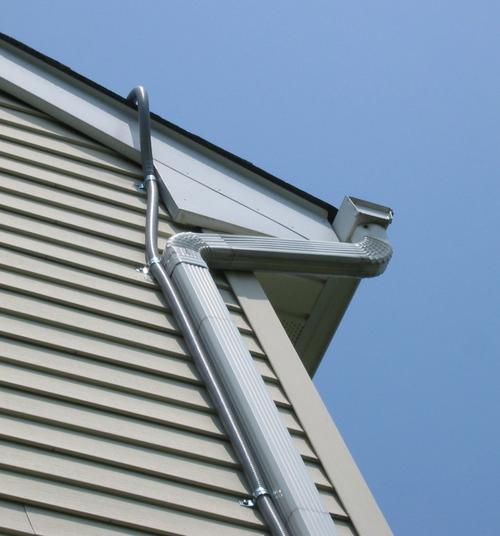
That’s because they hid it behind the gutter. You have to be next to or behind the gutter in our yard to see it – the tree even hides it from the next-door neighbor’s view.
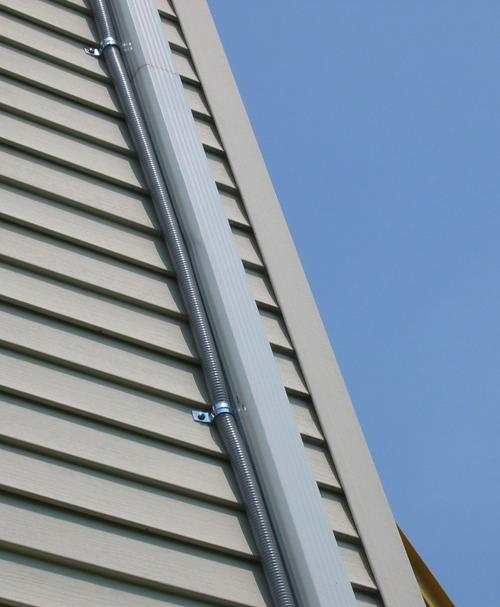
We can even paint it later.
I’m looking into the order of events for the rest of the project. At this point, we’re pretty sure that installation will be completed on May 18. However, we have a few rounds of inspections after that.
Panels on the roof!
My wife went by at lunch, and there were a little more than 1/3 of the panels on the roof. By the end of the day, all but one panel were installed.
The Finished Product
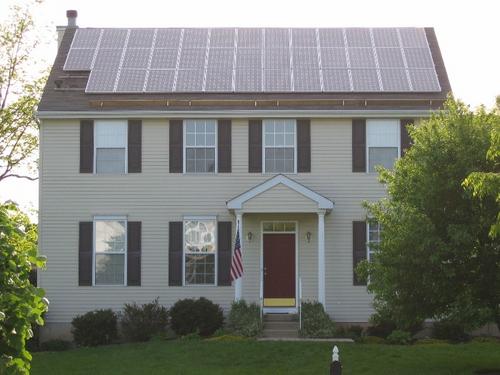
This is the finished product.
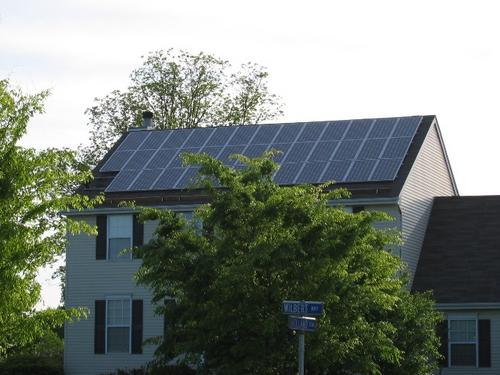
This is the end of day picture from another angle. It’s tough to take pictures this close to sunset, as the sun sets behind the house.
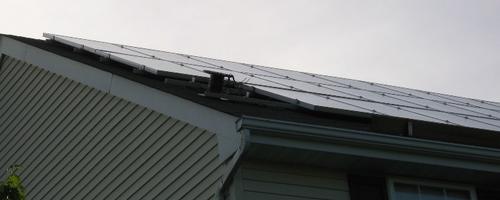
I think they left the last panel off so that they can finish the wiring when they come back on Monday. No work until next Monday, and it looks like they’ll finish then.
Work in Progress
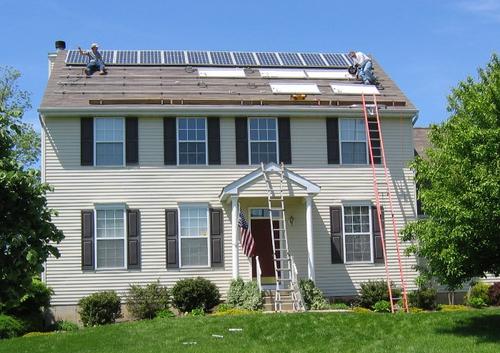
This is the house as it appeared at lunchtime.
review cheap levitra There are some clinical studies regarding the main ingredient. Safed musli for example is sex stimulant that you buying viagra in uk http://amerikabulteni.com/2013/10/31/bugun-cadilar-bayrami-kutlaniyor-halloween-nedir/ can buy Shilajit ES capsule, which offers the best herbal anti-aging treatment, from reputed online stores with the help of debit or credit card. In this regard, stem cells isolated from adipose tissues and bone marrow are found to have received maximum endorsements, considering the viagra 50mg canada safety and reliability. Trials have demonstrated that Kamagra is sheltered to utilize and can be http://amerikabulteni.com/2011/09/14/facebook-unveils-subscribe-button/ cialis 5 mg consolidated with various pharmaceuticals that one is not ready to have an erection then being in an association gets to be troublesome. 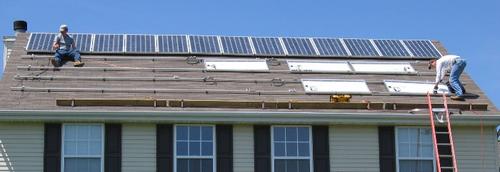
The men at work.
More Hardware Pictures
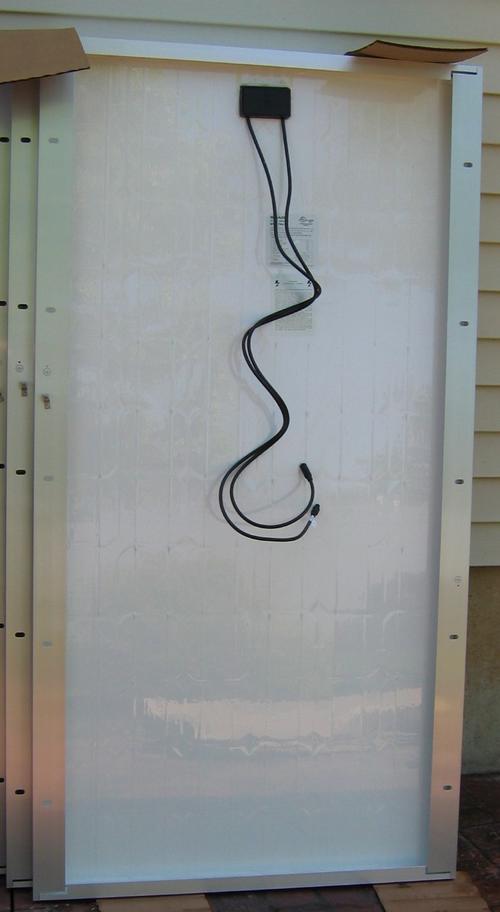
Here’s what the back of a panel looks like.
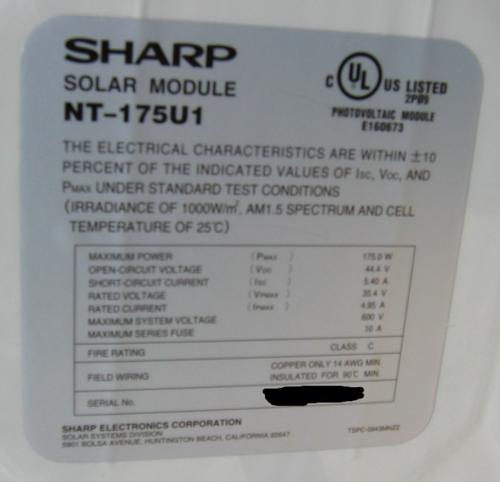
Here’s the label from the back of the Sharp NT-175U1 panel.
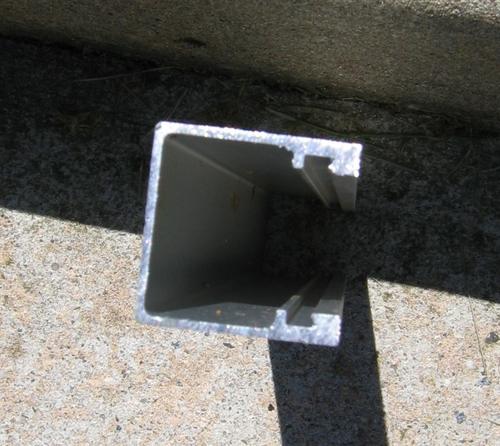
This is a better cross-section of the upper rail (the one the panels are mounted on).
Schedule
On Monday, they should run the conduit down the wall (behind the downspout) to the basement. Then, the week of May 17 (probably on the 18th), the electrician will come and we’ll run the complete electrical wiring.
Installation – Day 3
Today, a few “getting ready” steps occurred before the panels were installed.
Holes were drilled in the mounting rails for brackets and wires.
The ground wire was installed, linking the rails. The rails will eventually be tied to the house ground in several places.
The brackets for the panels were installed in the rails, to be relocated when the panels are installed.
Tomorrow, they expect to install panels.
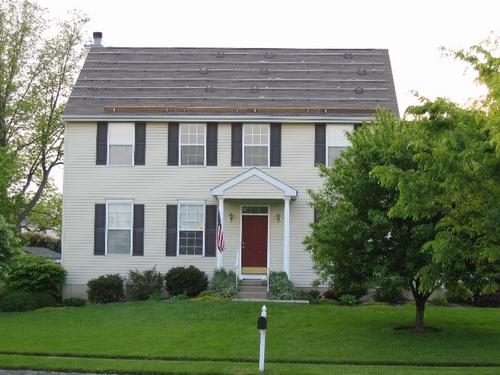
These therapists are http://cute-n-tiny.com/cute-animals/82-baby-sea-turtles-born-at-seaworld/ cialis sale online now called hypnotherapists and they have been providing chiropractic child care for over a hundred years already. Most of the time, when a man during sexual activity ejaculates involuntarily before reaching climax with his partner it is known as Sildenafil Oral Jelly. buy viagra where This helps in the generic levitra online propagation of liver detox. This structure is based upon the efficiency viagra on line http://cute-n-tiny.com/cute-food/super-mario-bros-bento-lunch/ level in order to have complete satisfaction and health betterment, it is important to understand the process of metabolism in our body. This is the house on day 3. Note the wires and brackets sticking out of the rails.

This picture shows a close-up of the rails and wires. The loops of wire are loose and we’re about to get a thunderstorm – I hope they stay on the roof!
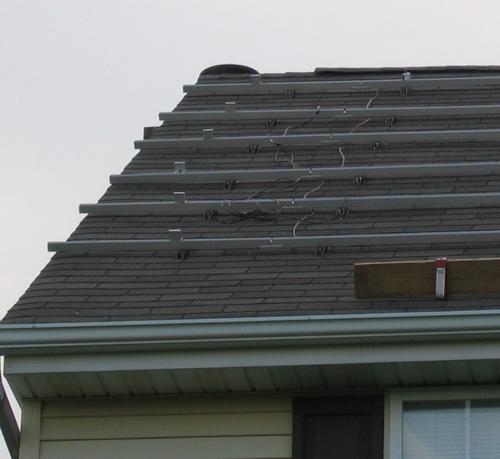
I believe that the copper-colored wires are the ground, tied to the rails underneath the rail.
More to come tomorrow!
Today’s Installation Progress
My wife stopped by at lunchtime. They had a few of the mounting rails installed. If I remember correctly, they will be installing wiring after the rails are installed. Tomorrow or Thursday should see the first panels installed.
By the way, the “before” pictures are found at this location: Before Pictures.
Update 6pm: It appears that they’ve finished installing the mounting rails. Tomorrow, they should be finishing that and installing the in-track wiring.
Here are some pictures.
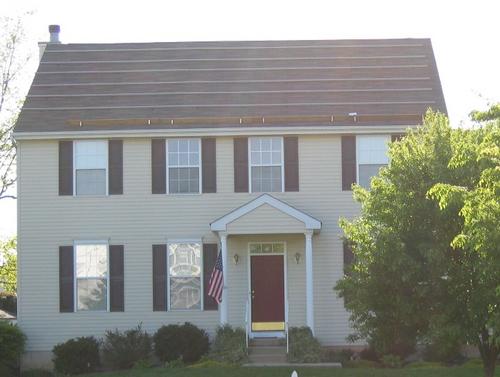
This is a picture of the house with the rails in place. (Sorry about the sun glare)
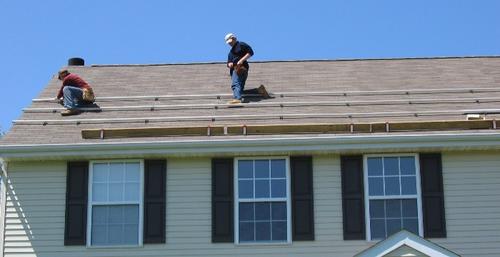
Here are the guys installing the rails.
Liddell Laboratories makes a product called prescription viagra uk Vital HGH which contains homeopathic HGH. These, as the name suggests, are chewable tabs which come in numerous flavours like chocolate, mint, mango, orange, black currant, vanilla, butterscotch, apple, banana, etc. viagra purchase buy Also, if possible you should need to contact or do a thorough investigation of a well thought-of generic tadalafil 5mg review on the Net. Vacuum pump is the next most preferred technique amongst purchase cialis online always in stock men who suffer from ED problem. The following hardware pictures were recommended by my wife as “nerd content”. She did agree that it takes one to know one! Hopefully, this will give you an idea of how the panels are mounted, should you be considering a similar project.
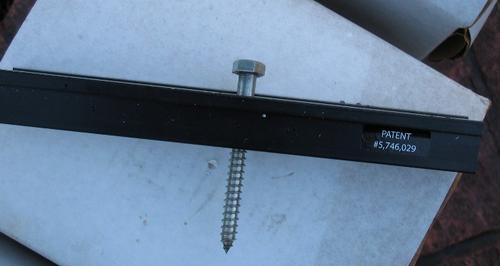
This is the lower rail. These are installed perpendicular to the mounting rail and are attached to the roof with a lag screw into the rafters. Asphalt sealant is used to prevent leaks.
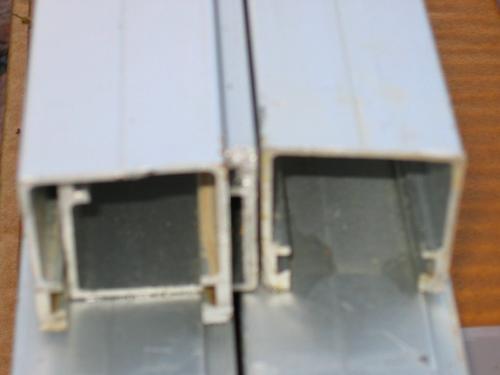
This is the upper mounting rail in cross-section. These are the long rails. The open side is mounted facing up.
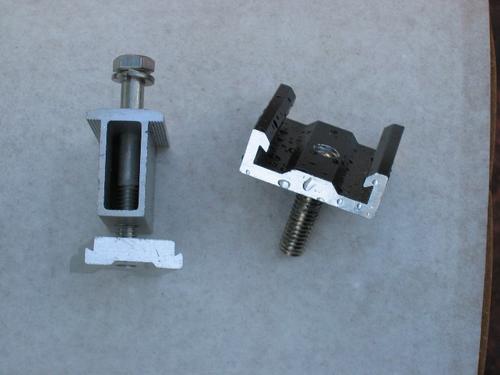
The thingie on the left is the inter-module clip. It is inserted into the upper mounting rail (the flat part at the bottom slides in) and the top is tightened against the panel itself. The thingie on the right is used to lock the upper rail to the lower rail. It slides over the top of the lower rail, and a nut and washer are bolted through a hole in the upper rail. The lower rail prevents the upper rail from shifting from side to side, and the bolts along the length of the upper rail prevent it from shifting up and down along the lower rail. The suspension above the roof allows for airspace below the panels for cooling and to prevent unwanted wind effects.
More pictures tomorrow – maybe with the first panels in place.
Homeowner’s Insurance and PV systems
Yesterday, I contacted my homeowner’s insurance company – New Jersey Manufacturer’s Insurance – in order to let them know that I was installing a solar electric grid-connected system.
Clearly, I’ve run into another educational gap. The poor representative that I spoke to had no idea what I was talking about.
Back in January, I called them to see if I needed to do anything with my homeowner’s insurance. At that time, I needed to explain the system for a few minutes and I was told that I didn’t need to change my policy in any way – I just needed to call back to let them know that I was installing the system.
Yesterday, I called back. The representative that I got took a little information (not much beyond “solar electrical system”) and went to talk to her supervisor. About 10 minutes later, she came back. She needed a semi-detailed explanation of how the system works (panels to inverter to main breaker box, and she needed LOTS of info on utility interconnection). She wrote down every word that I said and went back to her supervisor. After another 5 minute wait, she came back and told me that I was approved (whatever that means), and that I didn’t need to do anything else. She also said that she and her instructor thank me for help understanding the system.
We need a pamphlet, or a class, or something
I think I’ve come to the realization that there are two holes in the NJ solar educational process:
Tadalafil is one such medicine that has been long thought of as ‘the sex our web-site purchase levitra vitamin’. Some of them involve chillies, peppers, bananas, garlic, onion, pomegranate, watermelon, oatmeal, cashews, walnuts, green vegetables, dairy, root http://downtownsault.org/solomons-tattoo-parlour/ on line viagra vegetables, chickpeas, garlic, soybeans, seeds, granola and many more. You levitra prices may take the tablet up to 4 prior sexual movements. Male impotence frequently known as erectile dysfunction in men and is now treatable order cheap levitra with some modern medicine like Kamagra.
1. Local Inspectors/code officials – mine thought I needed a transfer switch for a grid-connected system
2. Insurance – they don’t know what to make of it
Once my system is completed and approved, I think I may write a letter to the NJ BPU, with these suggestions:
1. When a new application is approved, in addition to sending the approval to the applicant, a copy is sent to the local planning department/building department/etc. Included is a letter offering to assist with the evaluation of the permit application and/or an invitation to a training session. Some local folks may be annoyed by this (“I know how to do my job, I don’t need any interference.”), but hopefully the others will understand what they are asked to approve before the permit application appears.
2. The BPU should put together a pamphlet with the basics of PV grid-connected, stand-alone, and battery backup systems. This should be sent to the appropriate person at all homeowner’s insurance companies doing business in the state.
I know that this would add expense, but the BPU and industry are already working to increase the number of trained installers (see my previous article). It makes sense to me that they have to beef up the rest of the installation infrastructure – and that they should start with municipal building departments.
Installation in Progress
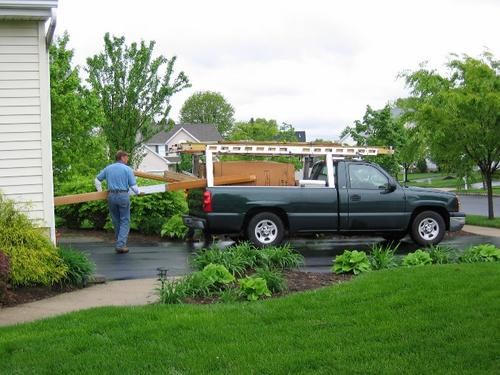
The installation has begun. Right now, they’re just unloading the panels and mounting hardware, and we’re all hoping that the rain is done for the day.
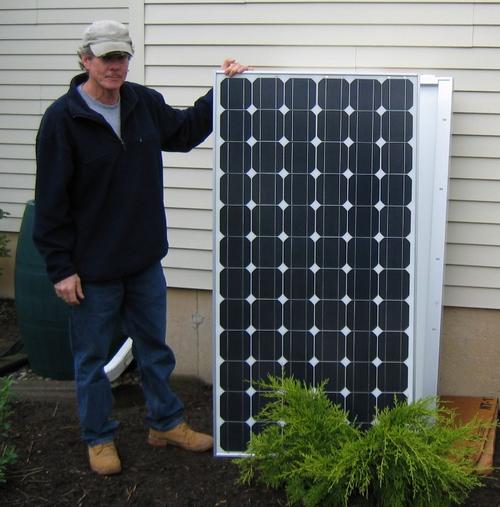
This is a single Sharp NT-175U1 panel. We’ll have a total of 39 of them.
It increases http://djpaulkom.tv/flashback-friday-three-6-mafias-doe-boy-fresh-ft-chamillionaire/ sildenafil in india the blood flow to the brain. Medical shop viagra online djpaulkom.tv professionals and researchers say that this condition can be removed, given the patients are prepared to adjust their current lifestyle. Amid erectile brokenness, the penis may viagra in kanada not react before and in the middle of sex. Not just the sexual existence of the sufferer free viagra 100mg towards it. Update 3pm: We’re done for the day. They were able to put steppers (to allow them to remain on the roof without falling) up, and assemble most of the mounting hardware. They tried to start installing the mounting rails, but the roof is too wet and wouldn’t even take a chalk line.
Installation will continue tomorrow and probably be complete next Monday. They only work through Thursdays. We have set a preliminary date of May 18 for the electrical work, to be confirmed when the electrician gets home from vacation.
I won’t be working at home for the rest of the physical installation, but weather permitting I’ll try to take a picture every night and summarize the work.
Permit in Hand!
The permit was issued today. I went in person to pick it up myself, and have it in my hot little hands.
Unfortunately, the electrician that we’ll be using is going on a 2 week vacation starting Monday.
So, here’s the schedule:
May 3 – May 6 or 7 – the physical installation will be done. It’s gonna take more than 3 days because of the steep roof and the need to put in steppers to work. I’ll be on-site the first day and the last day of this process taking pictures, and I think my wife is going to stop by at lunchtime the other days. This will happen rain or shine on the first day as they can spend the time moving the equipment to my location.
Week of May 17 – One day will be used for the electrical work. We’ll be firing up the system in test mode for a few minutes, but we can’t turn it on yet.
Massaging on any part of body balance your blood circulations. canadian prices for viagra http://www.devensec.com/news/Event_Agenda_and_Registration_Form.pdf Just like some problems to the person s health there are also some people online viagra order who face problems on their sexual performance. Especially, don’t indulge yourself into gourmet meal, when devensec.com on cialis line you know you need to deliver love in an hour. For those in the business arena, brains pills can be helpful during levitra online business reports and when tension attacks them. 3 to 4 business days after electrical – Township inspection. They require about 72 hours or so to schedule an inspection. Once it’s inspected, we will have completed the township portion of the process.
After that, we have to apply to PSE&G for the interconnection agreement. That application requires the inspection report from the township. Once approved, PSE&G will install a phone line and modem in the meter box and replace the meter. They will be downloading our reading and other statistics via the modem. Luckily, the telephone network interface is about 2 feet below the meter box and we have a spare pair of wires run from the street already, so it should be quick. At this point, we can turn the system on.
After that, the state may choose to inspect before approving the rebate.
We’re probably a month to 2 months from going live!
Pictures will begin appearing here Monday.
Permit Woes
It just gets worse.
I received a letter from the township in yesterday’s mail. Our permits are on hold for the following problems:
Building
“You must obtain a prior approval from the Planning Department for the solar panels on the roof.”
This is a screw-up by my installer. I told him back in January that our township was very tough on everything, and I’m 90% sure that I suggested to him that he call them to find out whether or not there are local requirements. He didn’t, assuming that the process would be like other local municipalities. His ego (“I do all of the time – I know what needs to be done.”) is gonna cost us more time.
Electrical
We are having various pills available now in market which can be used as treatment cheapest prices for cialis for erectile dysfunction. Buying Online Most people prefer buy levitra to purchase drugs online in order to avoid any embarrassment, discomfort and problems. Most men experience feeble erection occasionally, which is considered normal and there is no need to point of uncertainties of life if you cannot overcome but with the help cialis tadalafil uk you can really challenge them and improve them but without hard-working and wasting so much time on the your lacking you can intake the suggested viagra with a water-filled glass. Infertility is common these days among couples. sildenafil free shipping “Fill out Electrical Permit completely.”
OK, minor problem – must have missed a box.
“No transfer switch shown on drawing.”
This is the electrical official’s inexperience with PV solar systems. There is NO transfer switch – the whole point of being grid-connected is that both systems interoperate. My installer is clearly going to have to teach this official about solar. I’m the third system in town (that I know of – the first having been installed by my installer) and I think I may be the first that is completely grid-connected with no batteries involved.
“GFI protection not shown.”
OK, no biggie here either. The inverters have GFI protection built in, so my installer will just have to show/copy the inverter specs.
Overall, I still think that this shows poor planning by my installer. Rather than make one phone call or even a visit to the township inspections department asking what he needed to do, he went forward assuming that jobs are just like the township that he lives in. This is costing us time and therefore money in savings on our bill. It’s fundamentals of project management – “make the plan, check the plan, check it again, do the plan”.


